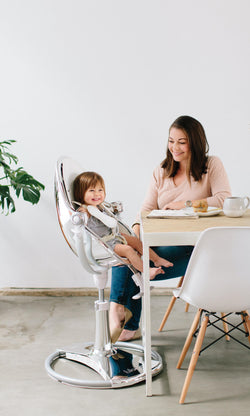
Most parents can agree that kids’ artwork is adorable, but I consider myself lucky that I actually really like a lot of the pieces my two-year-old brings home or makes in the comfort of his bloom fresco. It probably doesn’t hurt that I know very little about visual art and am more often than not drawn to abstracts, so his messy finger paintings are right up my alley.
But the projects pile up so quickly, and there’s only so much room on the refrigerator doors. A few weeks ago, I decided it was time to finally put together a display that not only honors my son’s creativity, but fits into my home decor, too. I also wanted to preserve a few of my favorite pieces. Unfortunately, I have very little wall space to spare, and most tutorials I found online for displaying kids artwork either take up a ton of room, or feel really temporary. Often both.
Inspired by my son’s “abstracts,” I got a little weird, too. Rather than framing each project individually, I layered three of them (everything looks better in threes, of course!) with decorative paper as the background. Five easy minutes later, it was on the wall.
My quick collage doesn’t take up very much space and more importantly, it looks intentional! I take that back; the most important thing is that my son was beaming with pride when he woke up and saw his projects so beautifully displayed in the house. But really, it looks good, too.
Because I mount the pieces using craft tape, it’s not as easy to rotate projects as it would be if I were using clips or wires. But when I’m ready to swap out the art, I’ll create a new collage on more decorative paper, and pop the old one in a drawer.
Ready to free your fridge? Here’s how.

What You’ll Need:
- Three complementary pieces of your kid’s most masterful art, preferably three different sizes (or even shapes!).
- A large picture frame (a 16 x 20 frame works great for this project)
- Decorative paper or poster board
- A craft blade and straight edge (or scissors)
- Double-sided craft tape

Instructions:
1. Cut the poster board or decorative paper to fit the size of the frame backing. (And you should probably go ahead and write your kid’s name and the year on the back of the paper because you know you’re going to want it there when you find this thing or swap the frame in 20 years.)
2. Lay out your art on the decorative paper to check for placement, then use the double-sided tape to affix each piece.
4. Align the decorative paper/art with the frame’s backing, put the frame back together, hang it up, and admire your one-of-a-kind co-operative work of abstract art.
When it comes to toddler arts-and-crafts time, don't overlook the value of your high chair. We love the modern multi-use, height-adjustable Fresco for its two-tray system: use one for feeding and the other for painting and other creative stuff. Both are dishwasher safe and clean up quickly.
Get to Know...the Fresco High Chair from bloom on Vimeo.
you might also like:
7 ways to introduce your baby to spices
"i shared a bedroom with my baby and it was the best"
essential travel tips for new parents (from seasoned parents)
Emily Farris is a writer, recipe developer, prop stylist, and blogger. She lives in Kansas City, MO, with her husband, toddler son, and two rowdy do


